Creating ontology
The Document Subtype and Ontology Configuration module is a vital component of our product, designed to empower users to create distinct categories of document subtypes. This comprehensive documentation outlines the essential steps within this module to effectively organize document subtypes and establish a structured document hierarchy.
The Document Subtype and Ontology Configuration module allow users to create diverse categories of document subtypes. By categorizing document subtypes within projects and establishing a structured hierarchy, users can enhance the classification and organization of documents.
Key Features of the Document Subtype and Ontology Configuration Module
The Document Subtype and Ontology Configuration Module encompass the following key features:
Document Subtype Creation: The module empowers users to create distinct categories of document subtypes.
Hierarchical Organization: Users can categorize document subtypes within projects and establish a structured document hierarchy.
Note:
If you encounter any issues, contact your system administrator.
Adding Subtype / Ontology
To add document subtype / ontology, follow these steps:
-
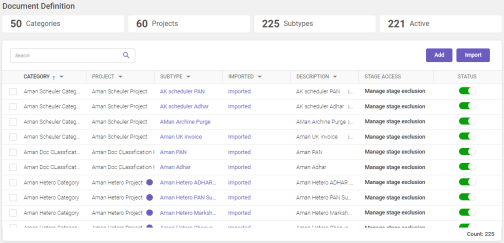
In the main menu, under Document Definition, click Subtype / Ontology. The Document Definition page opens.
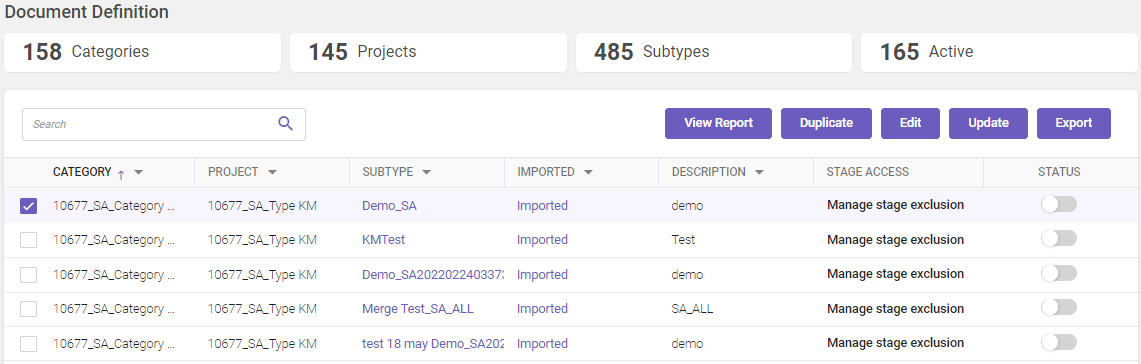
The top of the Document Definition page displays the total count of existing categories, projects, subtypes, and active documents.
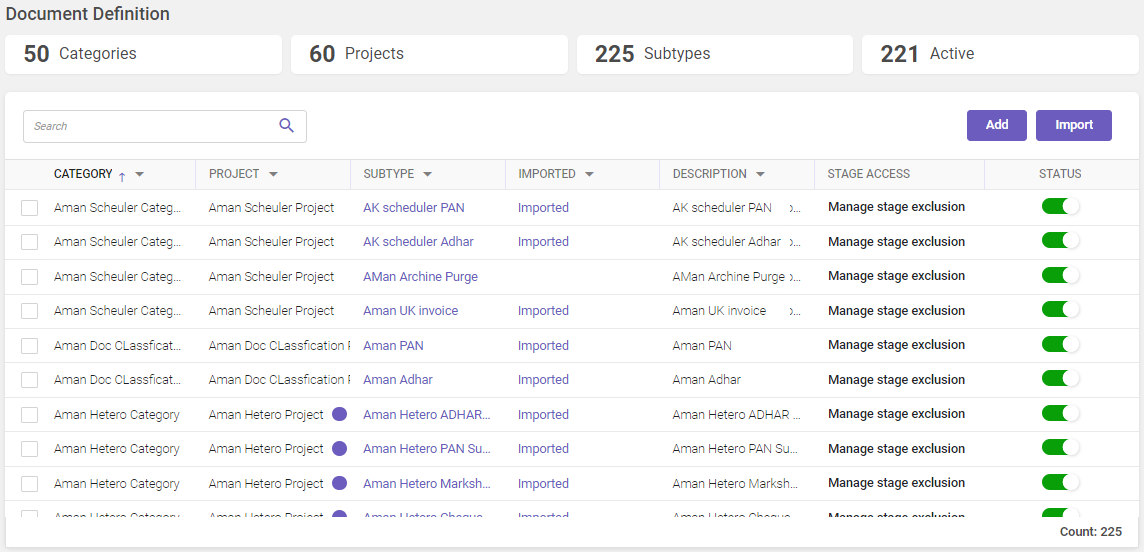
Column header descriptions
|
COLUMN NAME |
DESCRIPTION |
|---|---|
|
Category |
Displays the name of the document category to which the sub-type belongs. |
|
Project |
Displays the name of the project to which the sub-type belongs. Note The |
|
Sub-type |
Displays the name of the subtype. Note Each sub-type name is linked to its respective document ontology page. |
|
Imported |
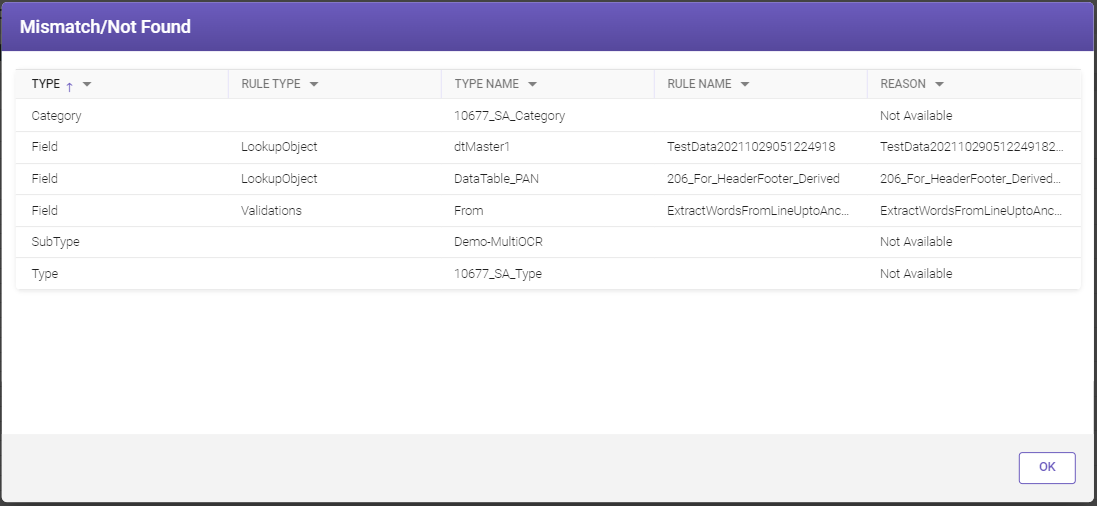
Link that provides the information about any mismatch found (see below image) after importing of ontology.
|
|
Description |
Description about the document sub-type. |
|
Stage access |
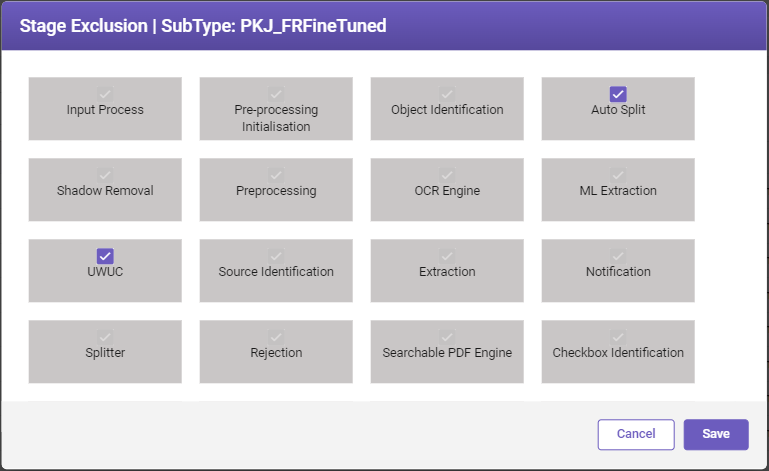
Option to include / exclude certain stages during document processing.
Note Unique-word unique-couple (UWUC) and Auto-split are two optional stages that a user can include / exclude based on the requirement. |
|
Status |
Switch to enable / disable a document sub-type. |
 icon indicates that the particular project is an integrated project. For more details about integrated documents, refer
-
On the top-right corner of the page, click Add. The Add subtype window opens with three tabs Subtype details, Parameters, and Profile & OCR.
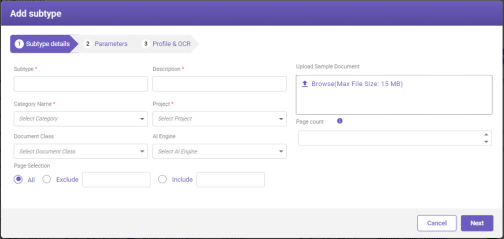
Click on the buttons inside the tabbed menu to know more.
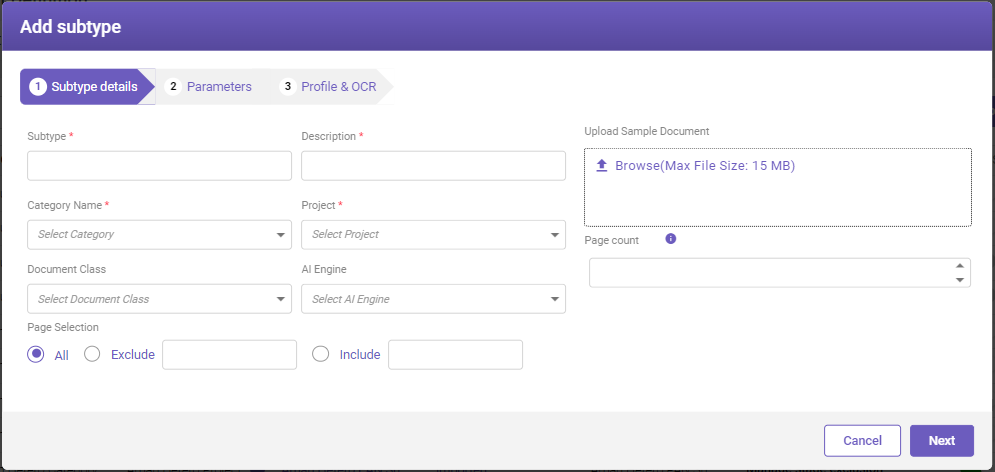
Under Subtype details tab, fill-in the details based on the following field descriptions.
|
FIELD |
DESCRIPTION |
|---|---|
|
Subtype* |
Enter the name of subtype to be created for the category. |
|
Description* |
Enter the description of the document subtype. |
|
Category Name* |
Select the document category name for which you want to create document subtype from the drop-down list. |
|
Project* |
Select the project from the drop-down list. |
|
Select the document class from the drop-down list. Note For any unexpected documents received for processing whose document type is unrecognisable, categorize and train such documents by assigning Others as the document class. |
|
|
AI Engine |
Select the required AI engine from the drop-down list. For configuring AI engine, refer AI engine configuration. |
|
Select the number of pages present in the document. Note If the number of pages is more than '0', then the document will be treated as a structured form. |
|
|
OCR Complete Document |
Enable the toggle button to perform OCR on the complete document. Note
|
|
Page Selection |
Specify the page number or page range to indicate the document pages that are to be included or excluded from getting processed.  Available options ALL: To sent the complete document for processing. EXCLUDE: To exclude particular page or range of pages from processing. INCLUDE: To include particular page or range of pages for processing. You can specify the page range in the below format:
|
|
Upload Sample Document (Max File Size: 15 MB) |
Click this button to browse and select the sample documents required to upload from your local drive. Maximum file size is 15 MB. |
|
* Mandatory fields |
|
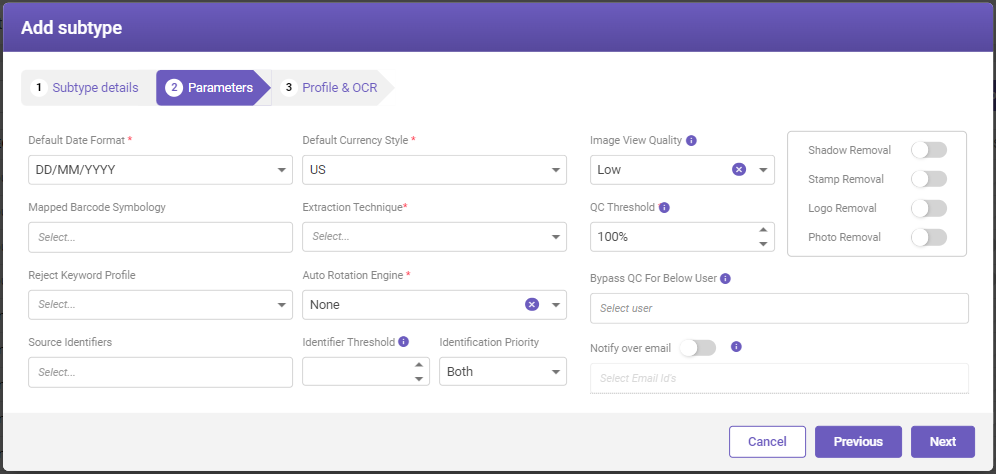
Under Parameters tab, fill in the details based on the following field descriptions.
|
FIELD |
DESCRIPTION |
|---|---|
|
Default Date Format* |
Select the default date format from the drop-down list. |
|
Default Currency Style* |
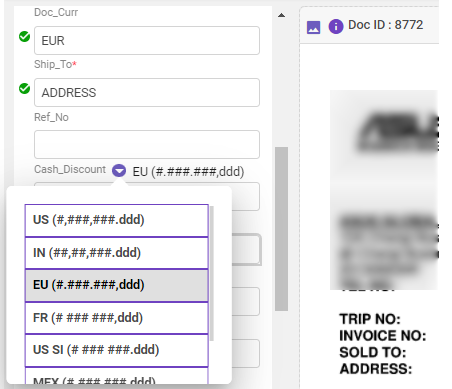
Select the default currency style from the drop-down list. Available currency style
Note Note: When a subtype includes a field type as Currency Value, a drop-down with currency styles is available for that field on the MI screen (see below image). More
|
|
Image View Quality |
Select the required option from the drop-down list. Available options are None, Low, Medium, and High. By default, Low option is selected. The impact on the image on the selection of the available option is listed below:
Note
|
|
Mapped Barcode Symbology |
Select the required type of barcode from the drop-down list. If you know the barcode type, select it from the drop-down else you can select Unknown. In the latter case, the barcode engine will read all types of supported barcodes from the document. |
|
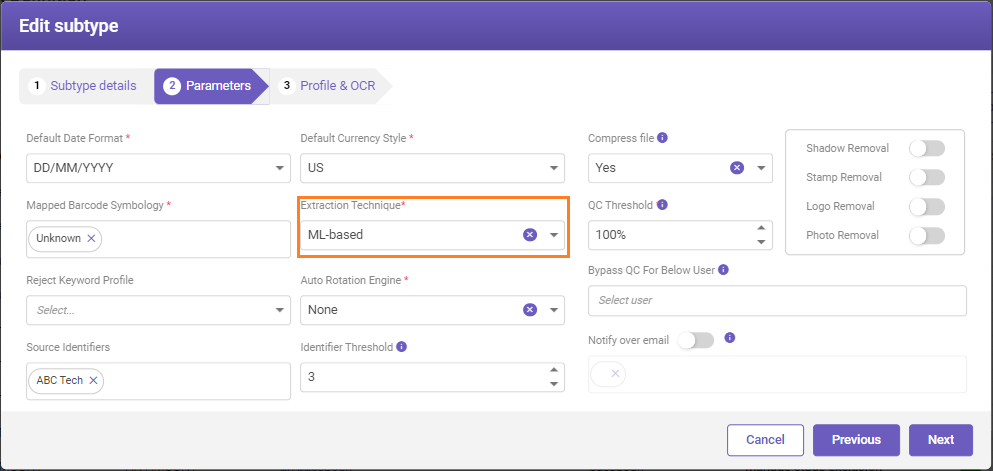
Extraction Technique* |
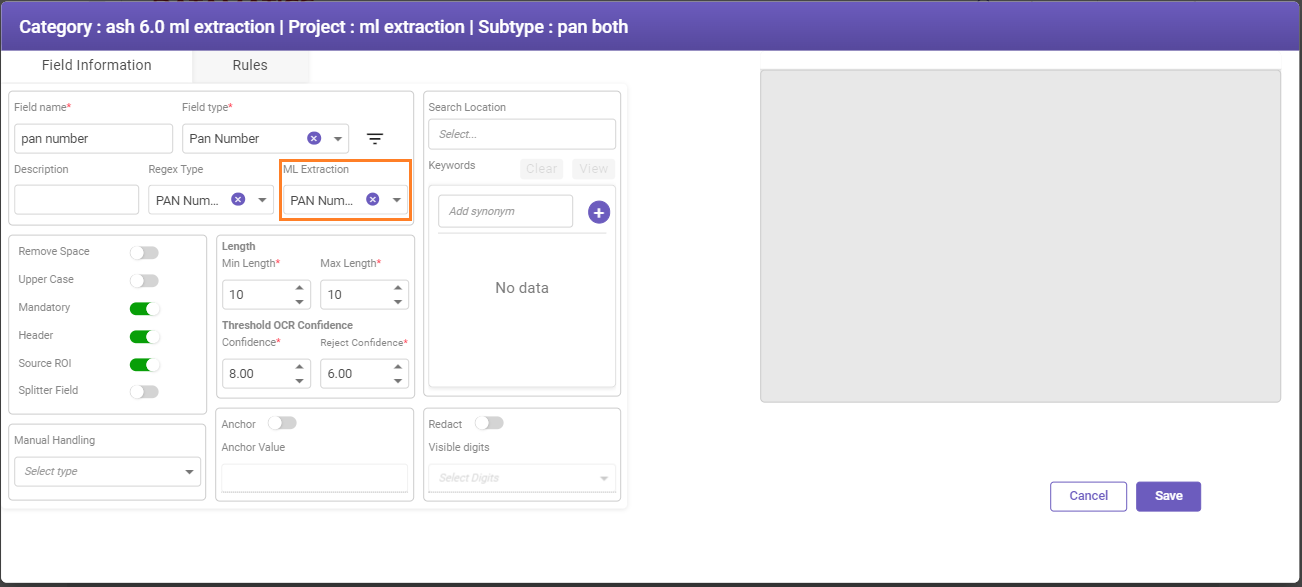
Select the required data extraction technique from the drop-down list. Available options are Normal Extraction, ML-based, and Both. Note
|
|
Defines the percentage of documents that should undergo quality check after MI. The documents could be the saved or corrected documents from the Manual Intervention (MI) or any other documents which has completed the auto-extraction process. Enter the percentage or use the |
|
|
Turn on to remove the shadows identified in the document. |
|
|
Turn on to remove the stamps identified in the document. |
|
|
Turn on to remove the logos identified in the document. |
|
|
Photo Removal |
Turn on the toggle switch to remove the photos identified in the document. |
|
The reject keyword profile contains blacklisted keywords. If detected in a document, then the document is not processed. (See Blacklist Profile Master.) Select the required profile from the drop-down list. |
|
|
Auto Rotation Engine* |
Select the required auto rotation engine from the drop-down list to auto rotate a document during preprocessing stage if required. |
|
Select the user to bypass the QC stage for the documents processed by the selected user and move directly to the export stage after MI. You can also select multiple users. |
|
|
Select the attributes of source identifiers from the drop-down list. Note Only the selected attributes will reflect in the manual handling page if subtype content field of Datatype Source Name is selected. The user can validate and check if the extracted value is accurate or not, if not then modify and save. |
|
|
Identifier Threshold |
In a set of documents for a particular subtype, if a business keyword is identified more than or equal times than the identifier threshold set value, then that business keyword gets directly auto-approved by the system and is added to the source key field table. If the business keyword (source identifier) occurrence does not match the set identifier threshold value, and if the user still wants to approve it, the user can approve from the review source identifier module. Enter the value to indicate the count where the identified keyword gets directly added to the source database. |
|
Identification Priority |
Select the type of identification priority from the drop-down list. Available options are Both, Logo, and UWUC. |
|
Enable the toggle switch to notify through email about any changes done to the ontology at the field level. When you enable the toggle switch, the Select Email Id's text field is enabled, select the email id of the user to be notified. You can also select multiple email ids. Note If you click save on the ontology screen, an email will be triggered irrespective of any change done or not done to the ontology. |
|
|
* Mandatory fields |
|
 icon to increase and decrease the number. Min 0% and Max is 100%.
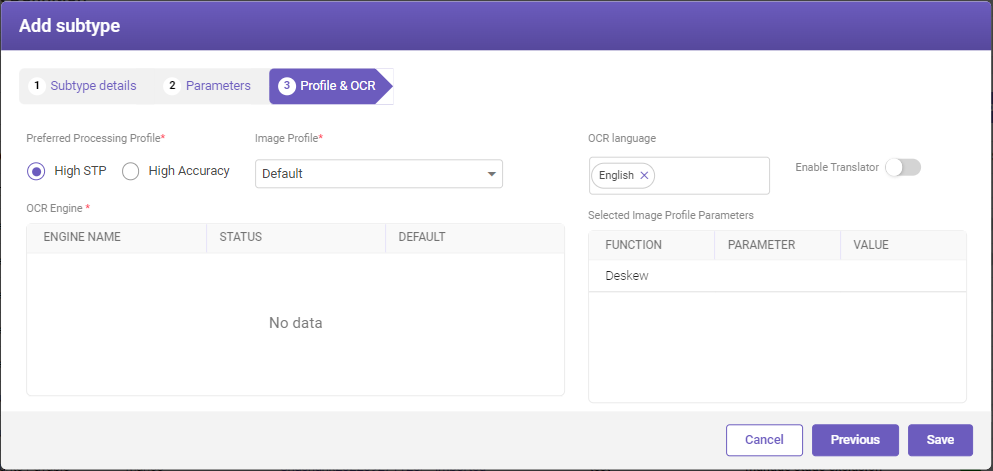
Under Profile & OCR tab, fill-in the details based on the following field descriptions.
|
FIELD |
DESCRIPTION |
|---|---|
|
|
Select High STP or High Accuracy to indicate your preference regarding the data extraction process.
Note Only those OCR engines that have been enabled under Customer OCR Engine setting will be displayed in Add Subtype window (see Managing customer OCR engine). User can select multiple OCR engines by enabling their status and mark one of them as default. The default OCR engine will be primarily used for data extraction. More |
|
An image profile comprises of a set of attributes with predefined values to achieve optimal image quality that provides best extraction results. (See Image profiling setup.)Select the required image profile from the list. |
|
|
OCR Language |
Choose the required language option that is to be read from the document. Choosing the option will help the OCR engine to interpret the languages present in the document. |
|
Enable Translator |
Enable the toggle button to use the translator services for the subtype. Note This toggle switch is only visible if the Enable Translator Service toggle switch is enabled in the app settings. Refer to Translator services in app settings. |
|
OCR Engine* |
Displays the list of selected OCR engines. |
|
Selected Image Profile Parameters |
Displays the parameters related to the selected image profile. |
|
* Mandatory fields |
|
-
Click Save to save the details.
To edit document subtype details, follow these steps:
-
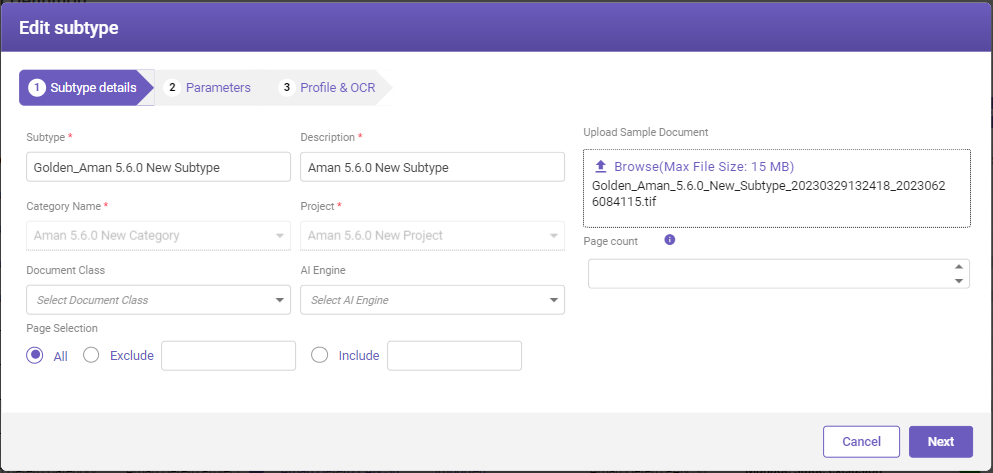
On the Document Definition page, select the required category name whose details you need to modify and then click Edit. The Edit subtype window opens.
-
Modify the necessary details according to your requirements and then click Save.
Note:
When you duplicate any subtype, a replica of the subtype gets created. All the details such as fields, tables, synonyms, validations, custom validations, regular expressions, extraction sequence, and region of interest get copied. You can edit any of these details on the copied subtype as per your requirement.
To create a duplicate of the document subtype, follow these steps:
-
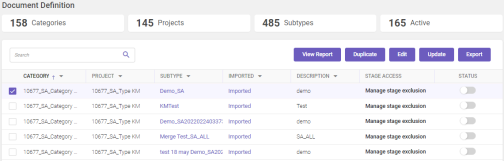
On the Document Definition page, select the required category name for which you want to duplicate.
-
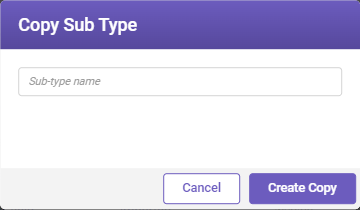
On the top-right corner of the page, click Duplicate. The Copy Sub Type window opens.
-
Type the subtype name and then click Create Copy. The subtype gets created and is added to the list successfully.
-
Click Export to export the subtype category list to the destination folder.
To view an ontology report, follow these steps:
-
In the main menu, under Document Definition, click Subtype / Ontology. The Document Definition page opens.
-
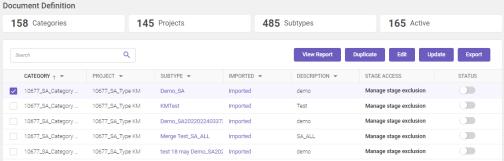
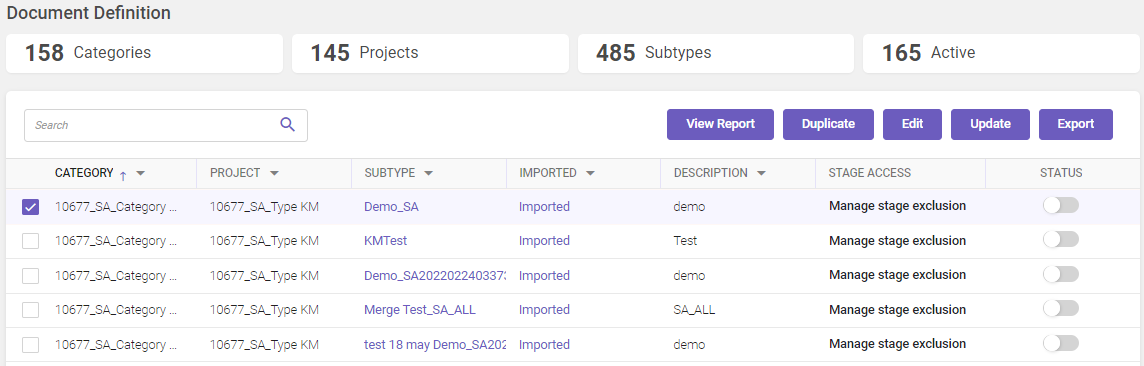
On the Category column, select the required subtype ontology whose report is to be viewed.
-
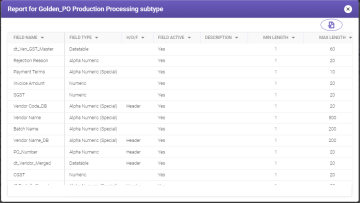
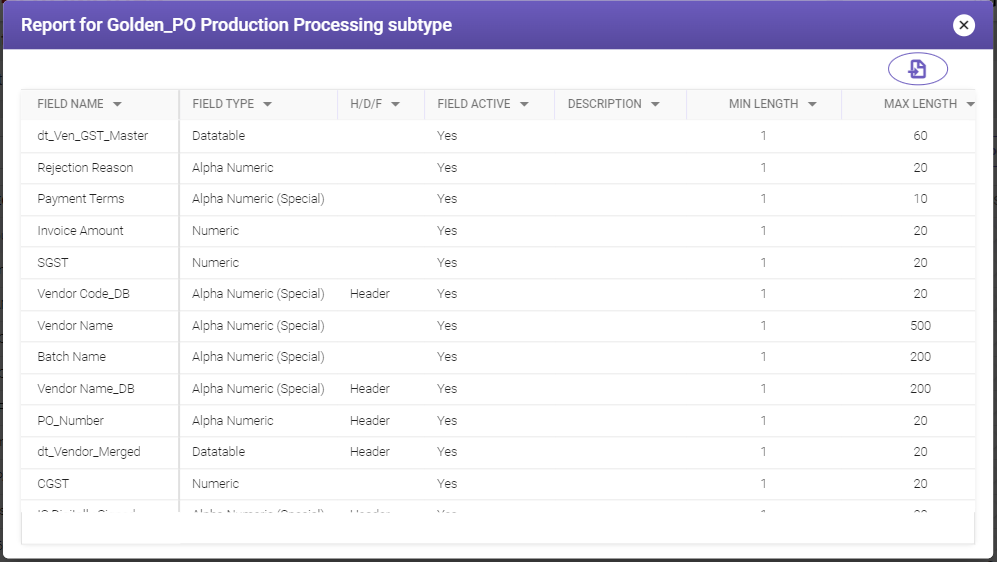
On the top-right corner of the page, click View Report. A report window with the name of the selected subtype opens displaying the field parameters set for each field for that subtype.
-
Click
 to export the ontology report. The exported file is saved in filename: ontology name_yyyymmddhhmmss format.
NEXT
Now that you set up an ontology, it's time to create fields.
Useful links
Integrated documents processing